
book boudoir PLAYBOOK
The Deliver Magic Book Boudoir Playbook is your guide to creating captivating, high-quality photos that bring a book’s story, design and unique elements to life.
Your goal is to build a stunning image portfolio that elevates the book’s visual appeal, making it stand out in a crowded market. From the cover and spine to every inside page, your photos need to capture the essence of the book while offering creative assets that authors and publishers can use to promote their work across multiple platforms.
What’s in the book boudoir portfolio?
Every Book Boudoir session is customized to highlight the unique qualities of the book— its design, content and visual appeal. Here’s a look at the types of images typically created for authors and publishers in the personal and business development genres:


COVER & SPINE - ONE BOOK
These images focus on capturing its title, design, and overall aesthetic. From different angles and lighting setups, these shots bring out the texture and detail of the cover, making it a standout image for use on websites, social media, and marketing materials.

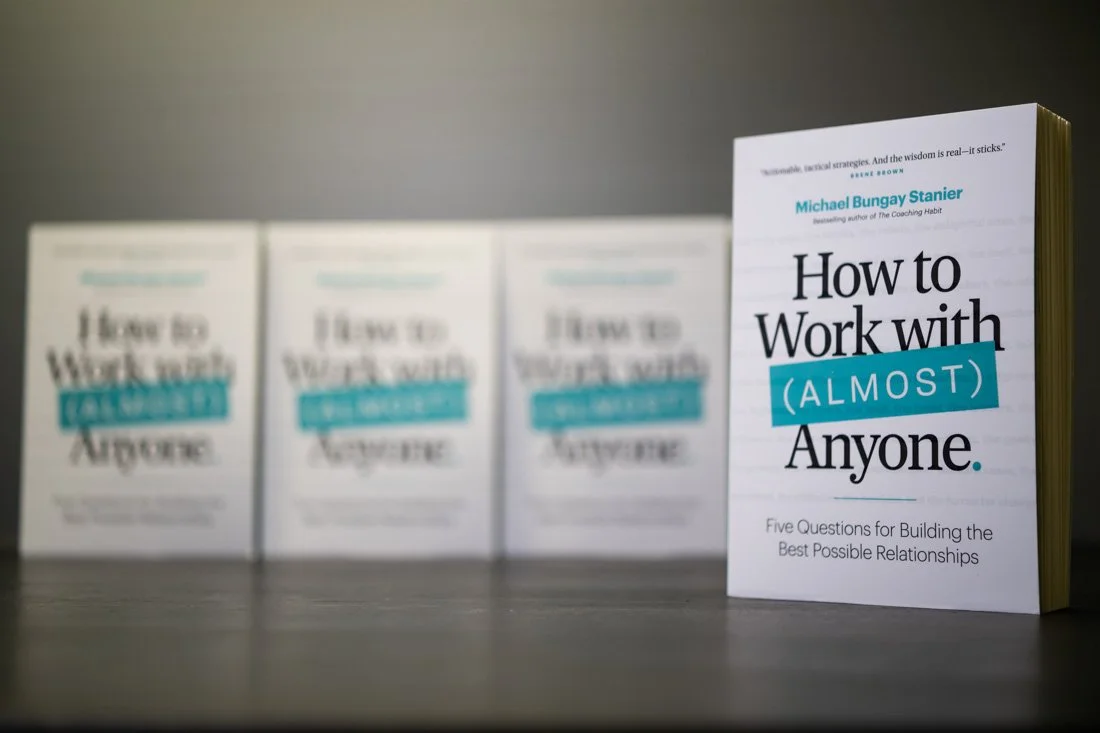


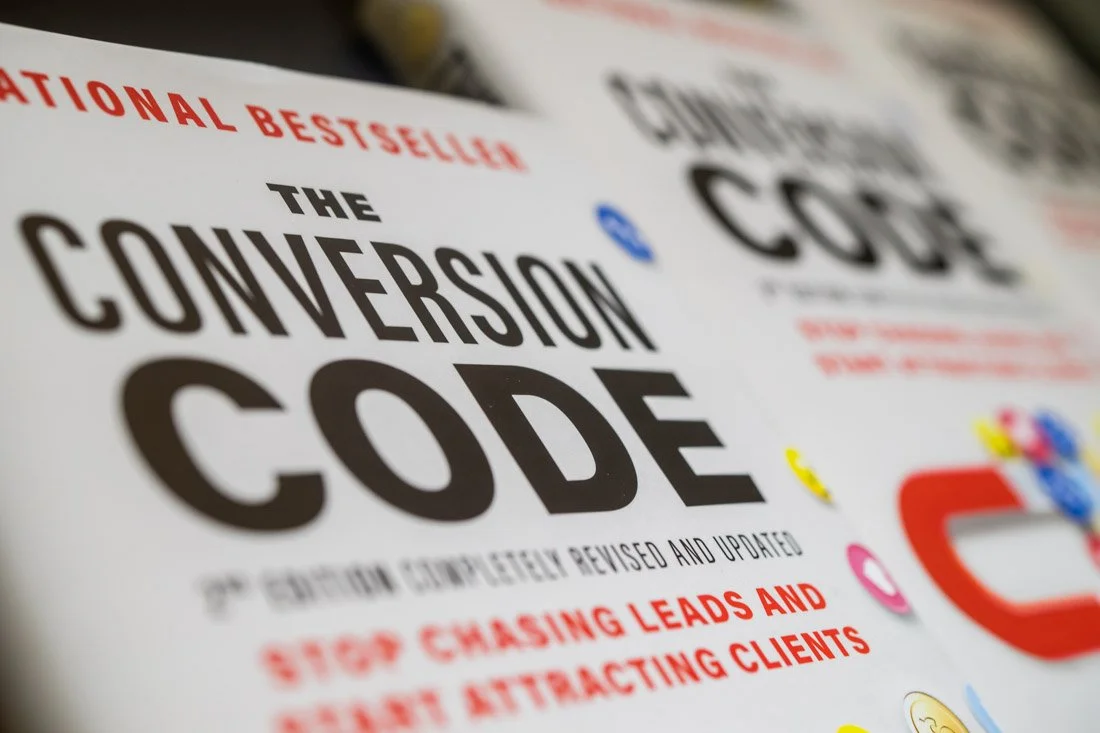


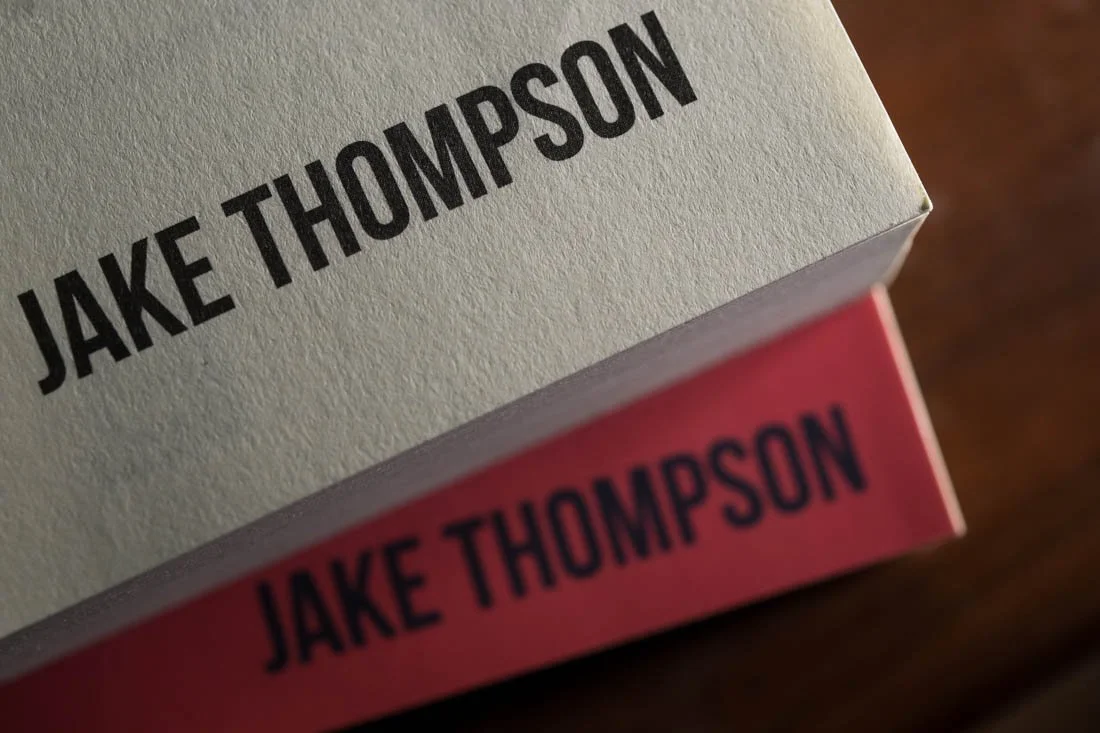
COVER & SPINE - MULTIPLE BOOKS
For a more visually impactful display, multiple copies of the book are arranged to emphasize the spine and cover design. Whether stacked or positioned creatively, these images offer a range of options that showcase the book’s presence and provide variety for your marketing portfolio.

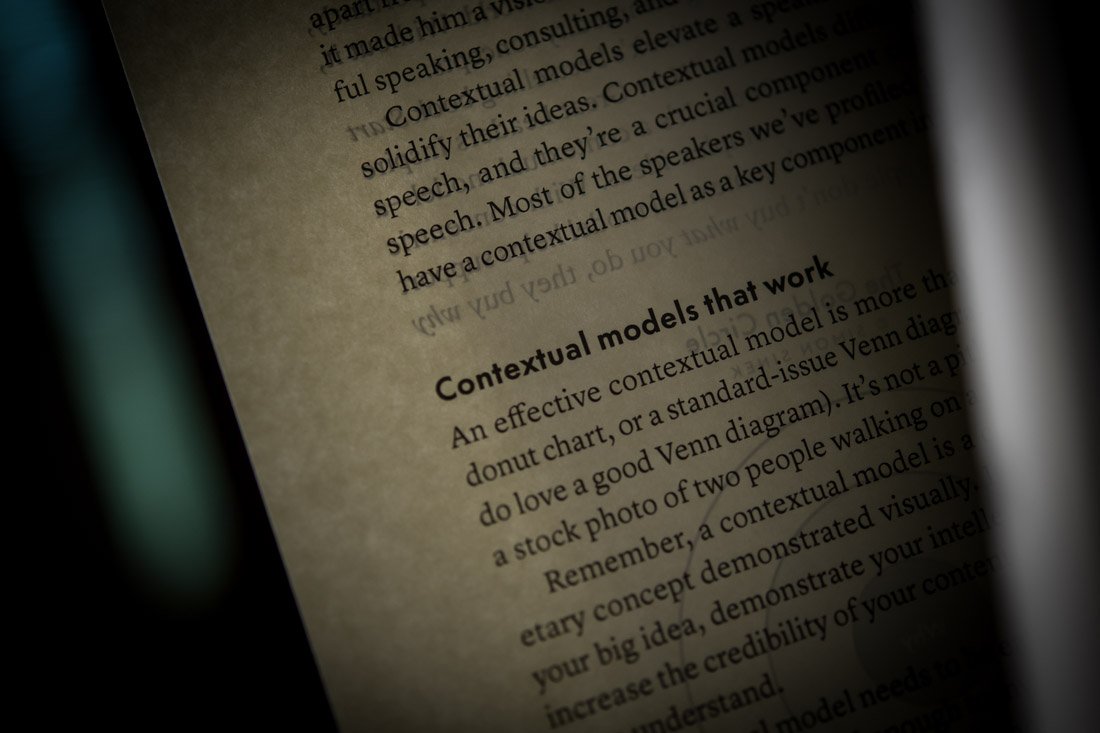

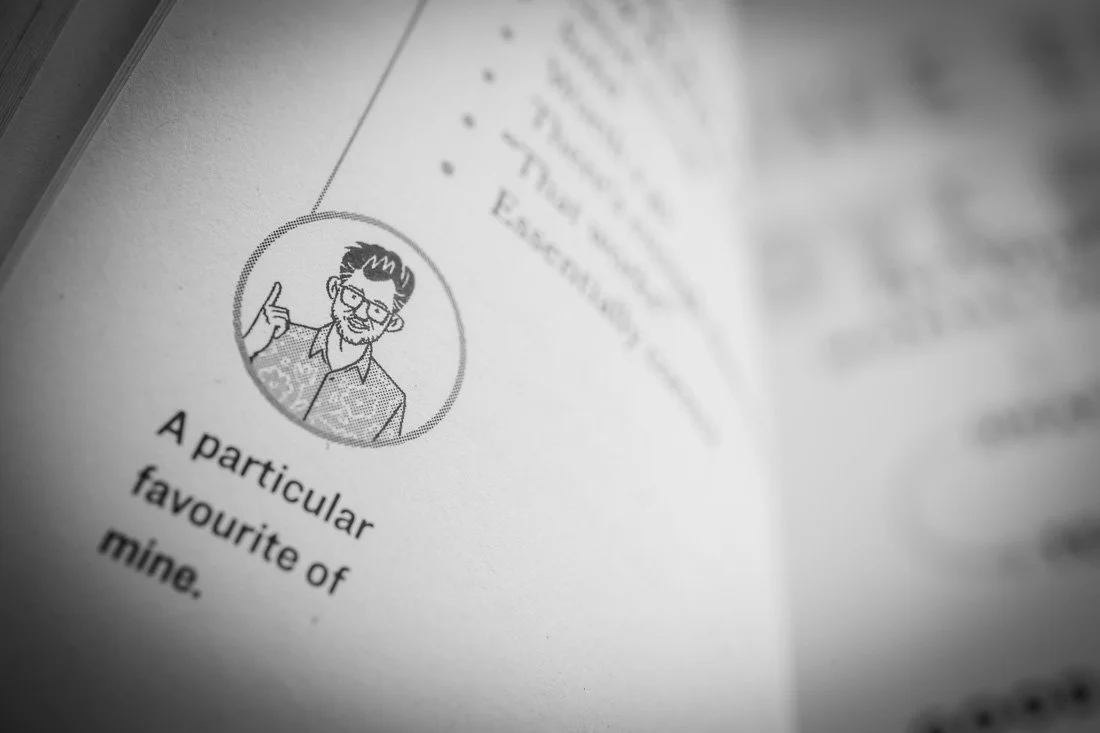


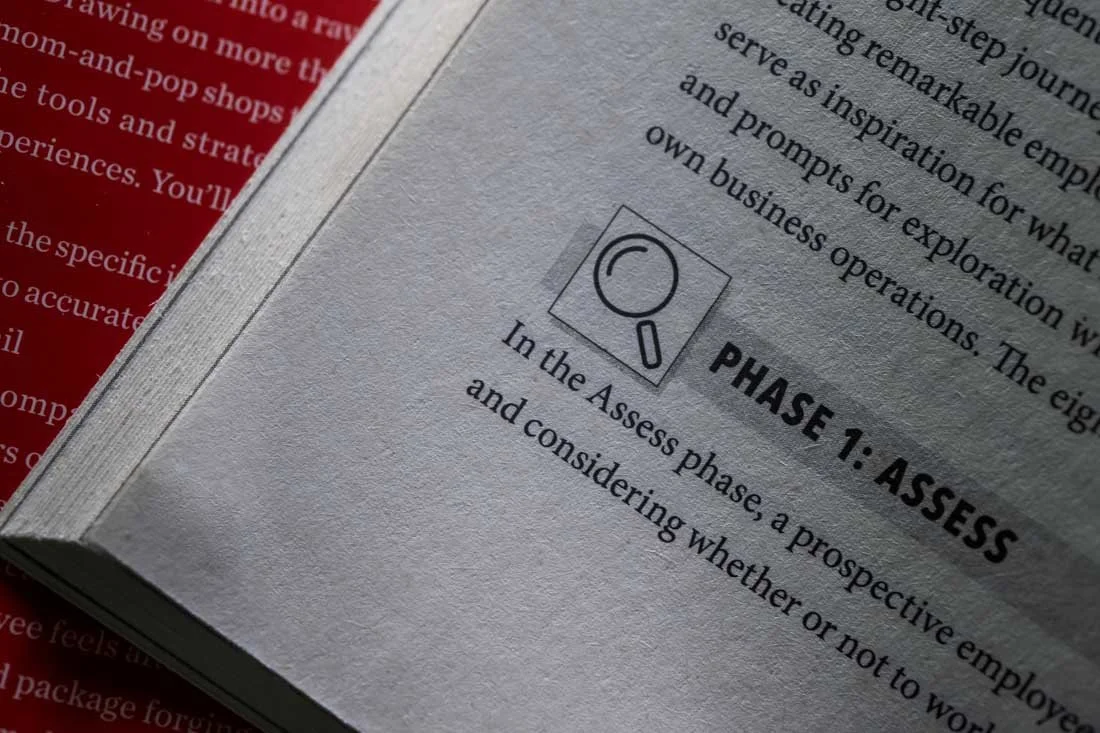
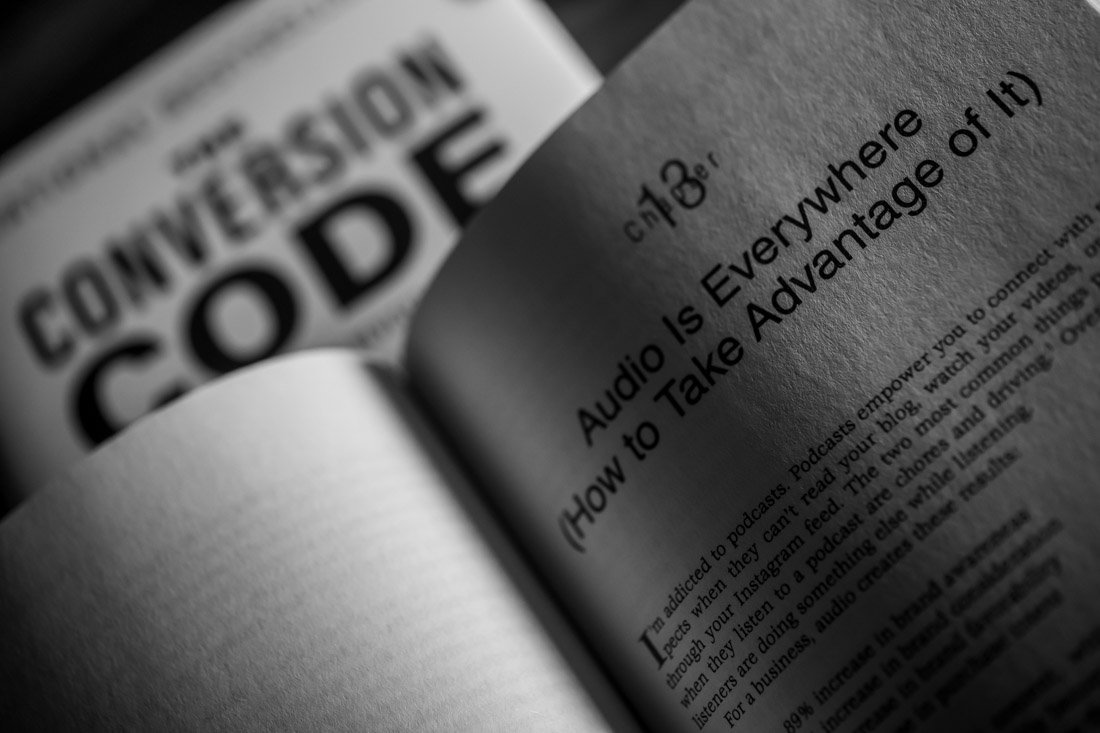
INSIDE PAGES - ONE BOOK
These images take a deep dive into the book’s interior, focusing on key content like pull quotes, section headers, illustrations or other interesting and unique design features. The goal is to highlight the important elements of the book’s content while creating visually engaging images that capture the book’s message.


INSIDE PAGES - MULTIPLE BOOKS
Layering multiple copies of the book adds depth and variety to the interior shots. These images combine the detail of the inside pages with the visual branding of the cover, providing a dynamic set of visuals that authors and publishers can use to promote their book’s content.


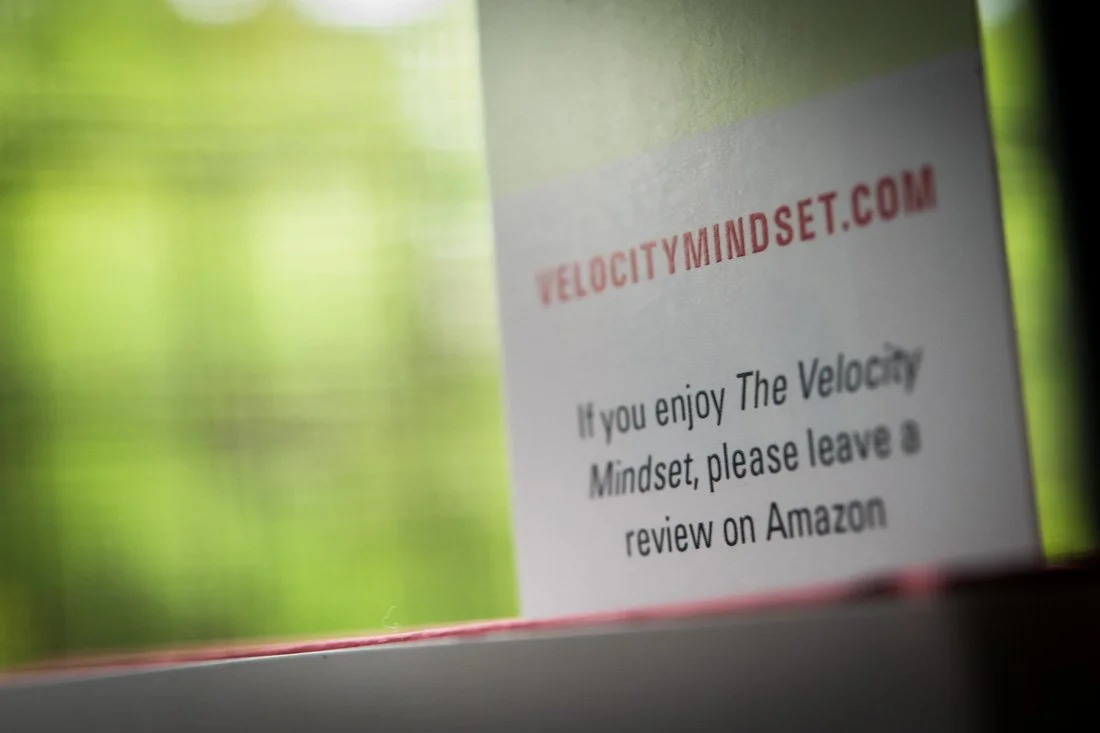


ADDITIONAL MATERIALS
For books that include special elements like bookmarks, inserts, or additional promotional materials, these images bring those added details to the forefront. By creatively staging these items, we create a well-rounded portfolio that showcases every aspect of the book package.
For more examples of book boudoir photos, go here.
How do you create these photos?
BEFORE THE SESSION
Establish Your Studio
Choose a location that is:Easily accessible with minimal travel time.
Suitable for repeat use with multiple staging areas (tables, chairs, walls, rugs, windows).
Flexible for shallow depth-of-field shots and has at least one clean, blank wall for simple backgrounds.
Well-lit and controllable, allowing for consistent results every session.
Review Studio Setup
I will conduct a video call or an in-person walkthrough with the photographer to review how to specifically leverage each go-to setup space. We'll explore how to maximize each area creatively while keeping the setup simple.Equipment
Make sure your camera, lighting, and staging equipment are ready:Lens: A macro lens (60mm or slightly wider) for capturing detailed close-up shots.
Lighting: An LED panel with barn doors on a flexible stand to allow precise light control.
Primary Staging Tools: 4-5 A-Clamps with rubber tips to hold books in place.
Secondary Staging Tools: Sturdy objects such as water bottles, coffee mugs, or paperweights to act as props that lean books against or keep pages open. Ensure they’re smaller than the books to remain hidden in the shot.
Editing Software: I use Lightroom Classic and try to avoid opening Photoshop unless absolutely necessary. Photoshop isn’t bad, but opening another program extends the post-process, and the goal is delivering high-quality images with speed.
DAY OF THE SESSION
General Guidelines:
Work with a Sense of Urgency
Efficiency is key. Move with intention and purpose. The more you shoot and edit, the faster your process will become, the faster you’ll be at making creative decisions, whic will, in turn, make your time more valuable.Overshoot to be safe
Since macro lenses require critical focus, shoot multiple versions of each element to ensure accuracy.Stabilize Your Handheld Camera
Use your body or lean on a surface to stabilize your shots and minimize focus shifting.Prop the Book with A-Clamps
Standing: Use clamps to keep covers open and secure the pages.
Lying Flat: Use clamps to create unique compositions by propping surrounding pages.
Lighting Techniques
For cover and spine shots, be mindful of the drop shadows created by your light hitting the book. Whether lying flat, freestanding, or leaning, check in-camera to ensure shadows don’t distract or diminish attention from the book itself.
For inside pages, adjust the lighting to create shadows and depth, adding dimensionality. Experiment with flat lighting or dramatic shadows using your LED light, adjusting as needed.Handling Glossy Covers
Avoid glare by adjusting the light source and shooting from unique angles. Some reflection is acceptable if it adds texture, but minimize distracting glare.Handling Hardcovers with Book Jackets
If the hardcover book has an additional design under the jacket, be sure to photograph both versions—jacket on and jacket off. This provides your client with more opportunities to use diverse images and creates additional visual variety for their marketing materials.Capture Cover and Spine Shots First
Always shoot cover and spine images first. When using A-Clamps to stage inside page shots, the book may get twisted and bent, making it harder to achieve clean cover shots later.Track Your Progress on the Shot Sheet
Scratch off each element from the shot sheet as you capture it to ensure you're meeting the deliverable count.
Visual Variety:
Cover & Spine
Clean Background Shots: Use plain walls, curtains, or paper backdrops to create a simple background that provides flexibility for your client’s design team to overlay branding or other elements in post-production.
Banner Framing: Shoot wide enough on ideal go-to setups so the client’s creative team can crop the image into a banner, leaving plenty of negative space for branding or promotional content.
Left/Right Justification: Move the book to one side of the frame to leave room for text or graphics on the other side.
High/Low Angles: Change your perspective by shooting from above or below the book. Low angles can emphasize the spine or give the book a towering presence, while high angles create a more intimate feel.
Yes, And’s: After capturing a shot you like, move slightly—left, right, up, down, further away or closer to the book—to create a series of images from different vantage points. This is a cheat code to pad the portfolio.
Don’t Ignore the Spine: The spine contains multiple elements—title, author name, a design element, and often the publisher’s logo. Based on the shot sheet or client request, capture isolated shots of these elements in interesting compositions to enhance the portfolio.
Layering Books: Grab another copy of the book and prop it into the negative space, creating compelling, branded images.
Inside Pages
One Surface, Multiple Angles: Use a surface that allows for 360-degree coverage around it. This provides the flexibility to shoot from various angles without moving the book to another space. Ensure the surface is low enough to shoot directly overhead with a fixed macro lens.
Experiment with Standing Shots: For inside pages, stand the book up and photograph key elements like text, quotes, or illustrations. This adds a unique perspective, offering variety by incorporating the out-of-focus shooting space into the inside page photos.
Know When to Shoot Wide Open and When to Close the Aperture: When shooting at various angles toward the intended design element or text, adjust your aperture to bring more of it into focus. Be mindful of when to shoot more open to creatively blur certain elements and draw focus elsewhere.
Additional Materials
If the author includes bookmarks or inserts, stage them creatively within your setups. Use layering or props to integrate them into the compositions.
AFTER THE SESSION
Backup Your Photos
Immediately back up your photos and start the editing process.Post-Production: 3 Passes
Pass 1: Cull and perform initial edits (don’t delete any frames as I would like to review your entire session to provide feedback).
Pass 2: Color and crop the keepers.
Pass 3: Final color adjustments, cropping, and last-minute culling.
Avoid Over-Editing
Keep edits subtle to enhance the natural look of the book. Minor adjustments like color boosting, deepening/opening up blacks, noise reduction, and sharpening are usually all that’s needed. For especially colorful books, add a touch of additional saturation.Save Color Processing Adjustments
Create presets for each of your go-to setups to streamline future editing. This will save you time going through your initial edit passes.Export Settings
Low Resolution: 1100x733 pixels.
High Resolution: 72 dpi, 100% quality.
Sort the Deliverables
Organize the final images into subfolders based on the shot sheet and review them before final delivery. Generally, folders will include:Cover and Spine
Single Book
Multiple Books
Inside Pages
Other Photos (e.g., bookmarks or additional materials)
Delivery Time
Ensure the final portfolio is delivered 2-3 days after the session.
